Our school gives us "ideas" Sweet/Salty snack Monday, Flower (real or made) Tuesday, etc. They give ideas for every day except Friday and then they threw a little blurb at the bottom "Don't forget the other teachers that help out!" Speech, gym, art...
So-I panicked. I needed a quick idea that I can make for the additional teachers. I typically try to get them just for holidays. I figure they get forgotten since they don't have their own assigned class. I started googling, found a picture with no link. No tutorial. Just a picture. And ran to Hobby Lobby. I also lost the link for the orginal post. It was on some "round up" So....thanks to whomever posted it! I will try to find you and tag you!
For this tutorial you need:
- Something to do the printing on. (I got 3 canvas totes at Hobby Lobby for $7.99 plus a 30%discount this week. So $6.39 for three... $2.13/bag)
- Acrylic paint in the colors you want. (I already have a ton of paint.No additional cost)
- Textile Medium (Anita's-Hobby Lobby $1.99) This makes the acrylic permanent on the fabric. You can find it with the normal acrylic paints at Hobby Lobby. If you want to skip this, you can just skip the acrylic paint and this all together and buy fabric paint. I used the weekly 40% off coupon so total cost $1.19
- Paint brushes,something to mix paint in
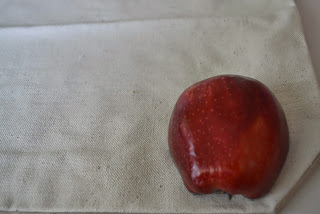
- apples-1 cut in half for 2 colors-I did 3 bags, so three apples. Already had-no cost today.
At this point, I would also recommend putting something inside the bag to protect the other side from leak through. I didn't. The paint didn't leak through to the other outside, but it did get onto the inside a bit. A piece of parchment paper would work wonderfully.
Cut the apple in half, cover half the apple in paint, and press down onto the bag. If you have a stem, make sure to paint that as well! It ends up adding to the design.
Sometimes you pick it up and you LOVE it.
Other times you don't. Don't fret! Just add more paint to the apple, line it up, and press again. I found that sometimes I needed to do counter pressure on the backside to get a good print.
Have fun and play with colors! I did two colors per bag and only decorated one side. The top right was made using a smaller apple, so more fit into the pattern.
These bags took me no time at all. MAYBE an hour for all three including set up, stamping, and cleaning. Total cost was $7.58 plus tax ONLY $2.53/Teacher gift!!! And something useful! Who doesn't need a resusable bag!


No comments:
Post a Comment